This post may contain affiliate links. Please read our disclosure policy.
Instant Pot Honey Garlic Chicken are sweet, savory, tender, and juicy chicken thighs prepared with the most amazing honey garlic sauce and cooked in an Instant Pot. Dinner, from start to finish, will be ready in 30 minutes!
If you love making Instant Pot chicken dishes, check out my Instant Pot Chicken Mole for a flavorful twist with a hint of chocolate and spices. Craving something comforting? This Instant Pot Chicken and Dumplings recipe is perfect for a cozy dinner.
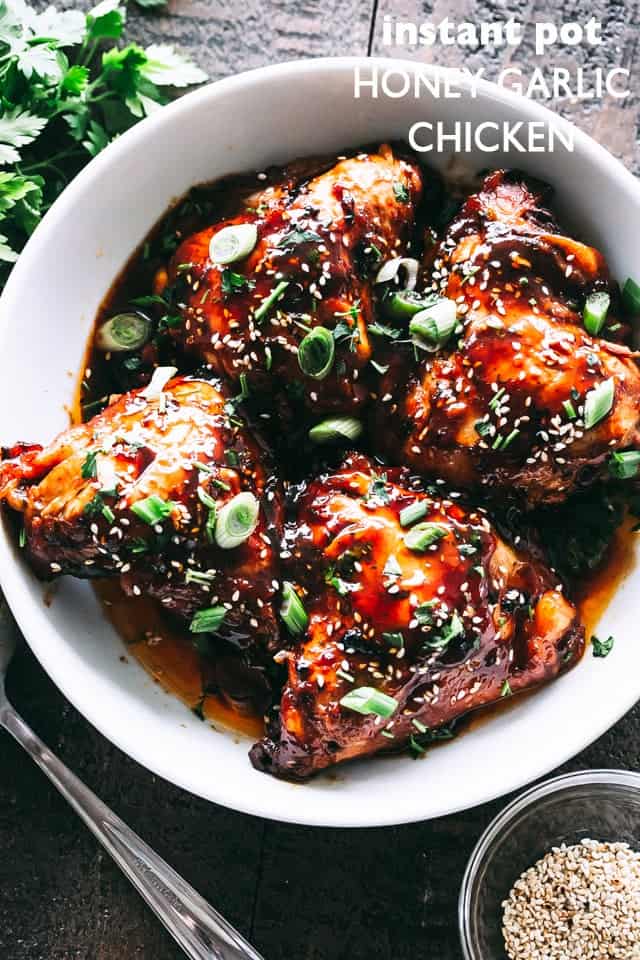
My #1 recipe for honey garlic chicken has been revisited and updated with a new twist because an Instant Pot is all the rage these days.
I know it’s so hard to choose between crock pot honey garlic chicken and instant pot honey garlic chicken. One takes hours to cook, and the other is ready in minutes. Honestly, though, the Instant Pot might be my new favorite way to cook. I do love my Crock Pot, but this pressure cooker thingamajig is a game-changer. Or maybe you’re more into good ol’ boneless skinless chicken thigh recipes on the stovetop? I love that, too.
Instant Pot Honey Garlic Chicken
This easy recipe for honey garlic chicken thighs is packed with so much flavor and requires very little effort. With just a handful of ingredients, this dish continues to be one of my go-to’s because it’s low maintenance and it’s fall-off-the-bone amazing.
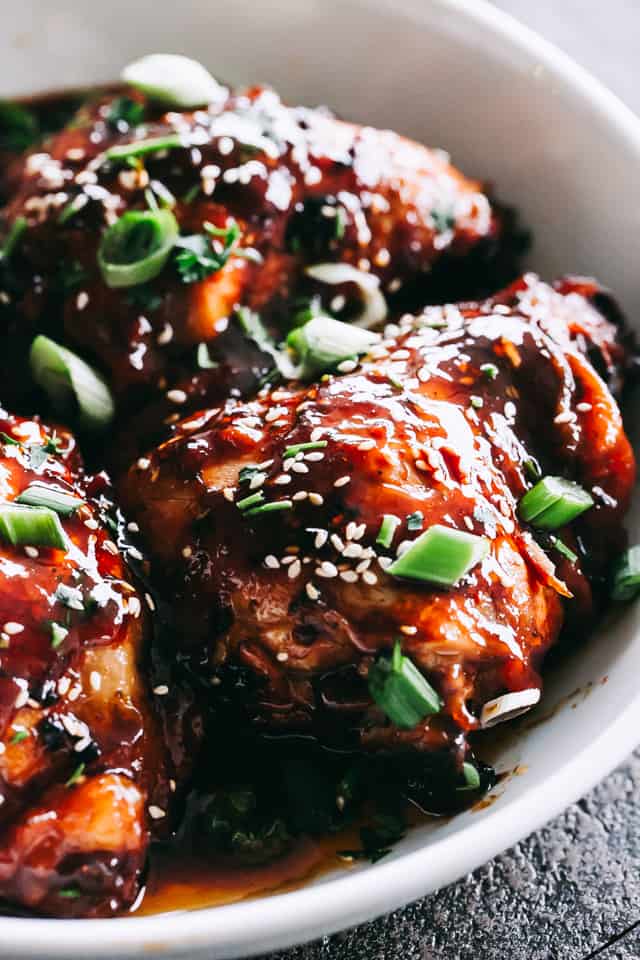
Clearly, I’m not talking about just any old chicken here. I’m referring to that special kind of garlic chicken that finds the perfect balance between sweet and savory, tender and juicy, similar to how the best bourbon chicken recipe masters that blend. Also, it can be made in about 20 minutes and that just makes my heart sing for joy! What’s more is that I always make extra so that I have at least some leftovers for tomorrow’s lunch. Adding it over a green goddess salad is pure bliss!
Gosh… There is not one single thing I don’t love about this type of food. The flavors in this dish are so simple, yet when combined, they are SO GOOD and out-of-this-world fantastic. It’s one of those recipes that you make once, and then you make twice, and then suddenly you can’t wait to make it again.
Recipe Ingredients
No big deal – the following are just a handful of ingredients you probably have sitting around. But once you put them all together? GIRL! The magic happens. This blend of sweet, savory, and aromatic ingredients creates a sauce that will take your taste buds on a joyride. Trust me, there’s nah.thing better. Let’s dive into what you’ll need to make these honey garlic chicken thighs.
For the honey garlic sauce
- Honey – Adds sweetness and helps create a caramelized glaze. Maple syrup or agave nectar are good alternatives.
- Garlic—I love this sauce with tons of fresh garlic, but you can also use garlic powder. You’ll need about a teaspoon.
- Soy sauce – Contributes an umami flavor and balances the sweetness of the sauce. Tamari or coconut aminos will also work.
- Ketchup – Adds some tanginess and body to the sauce.
- Dried oregano – For a hint of herbal flavor. Italian seasoning or dried thyme are okay to use.
- Parsley – Fresh parsley provides freshness and a pop of color, but fresh cilantro or basil is a great substitute.
For the chicken
- Sesame seed oil – Adds a nutty flavor and aroma, perfect for sautéing. Olive oil or canola oil can also be used.
- Bone-in, skinless chicken thighs – Boneless chicken thighs or chicken breasts can be used, but you’ll have to adjust the cooking time accordingly.
- Salt and black pepper – Basic seasonings to enhance overall flavor.
- Toasted sesame seeds – These add a bit of crunch and pretty visual appeal. I have also used chopped cashews and it was delicious.
- Sliced green onions – I use these for a garnish and to add a mild onion flavor and freshness. Chives are a good alternative.
How To Make Honey Garlic Chicken in the Instant Pot
Whether you want to make this in the crock pot, as we have done up until now, or in the Instant Pot, trust me when I say that no matter what route you take, in the end you’ll just be super glad that you made it. Once you’ve prepared the sauce, you can move on to browning the chicken thighs right inside your Instant Pot – one pot means one meal and fewer dishes to wash. I used bone-in chicken thighs and could fit only 4 at a time, but if you choose boneless thighs, you can fit 6 to 8 at once.
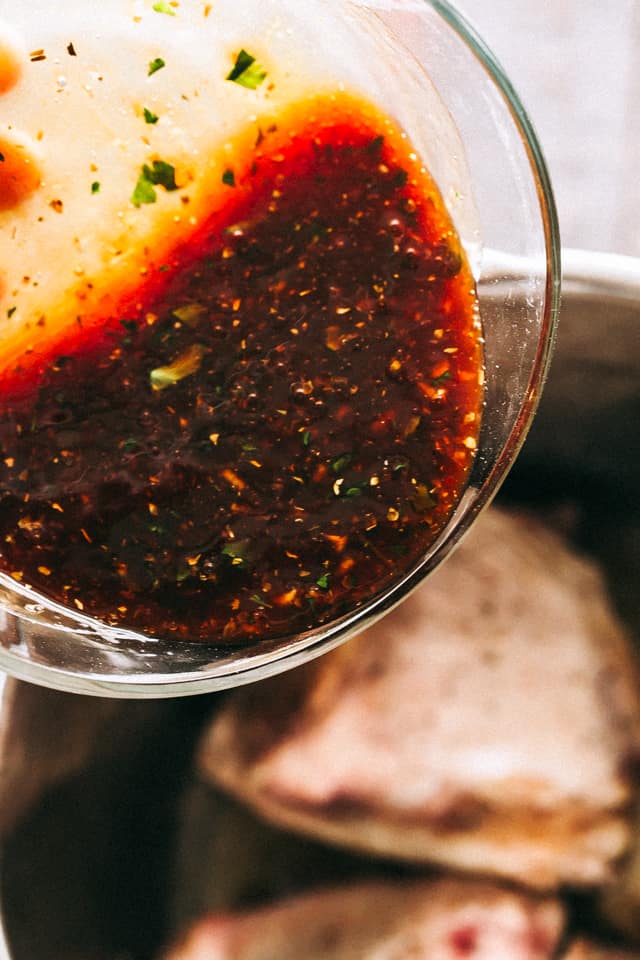
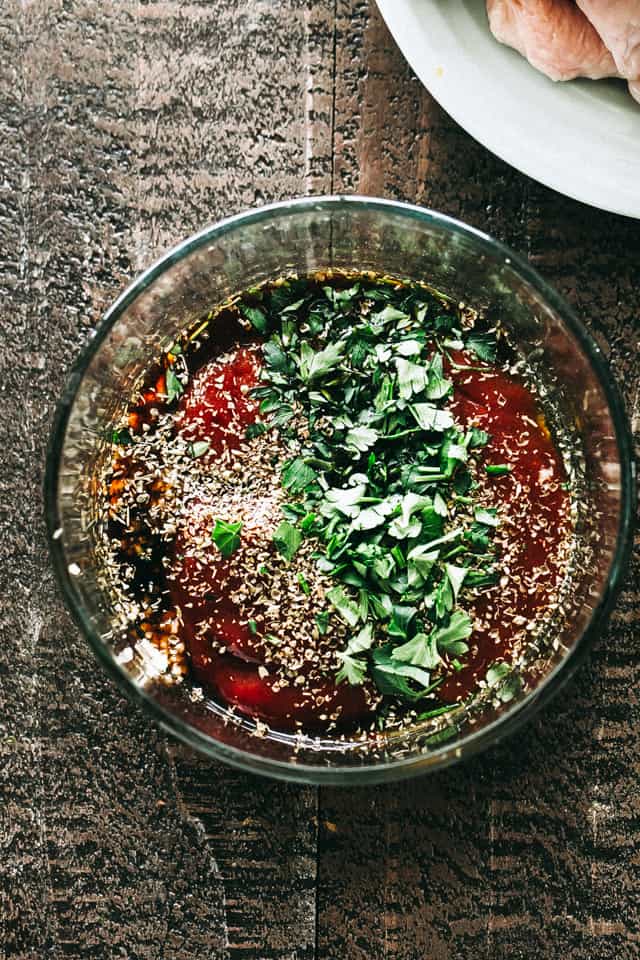
- Prepare the sauce: In a small mixing bowl, combine honey, minced garlic, soy sauce, ketchup, oregano, and parsley. Mix until well combined and set aside.
- Heat the Instant Pot: Set the Instant Pot to sauté mode and add sesame oil to the pot.
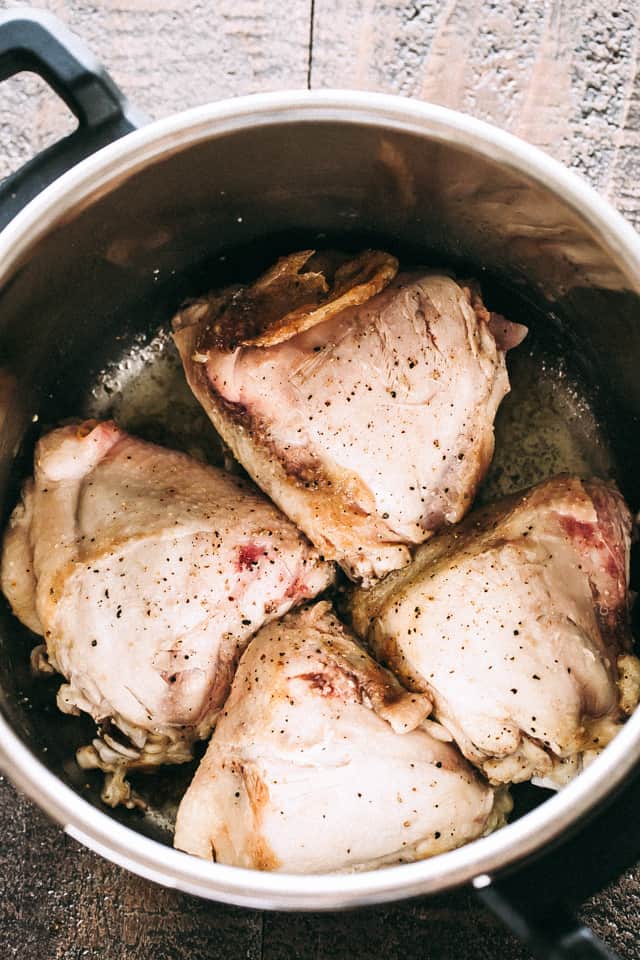
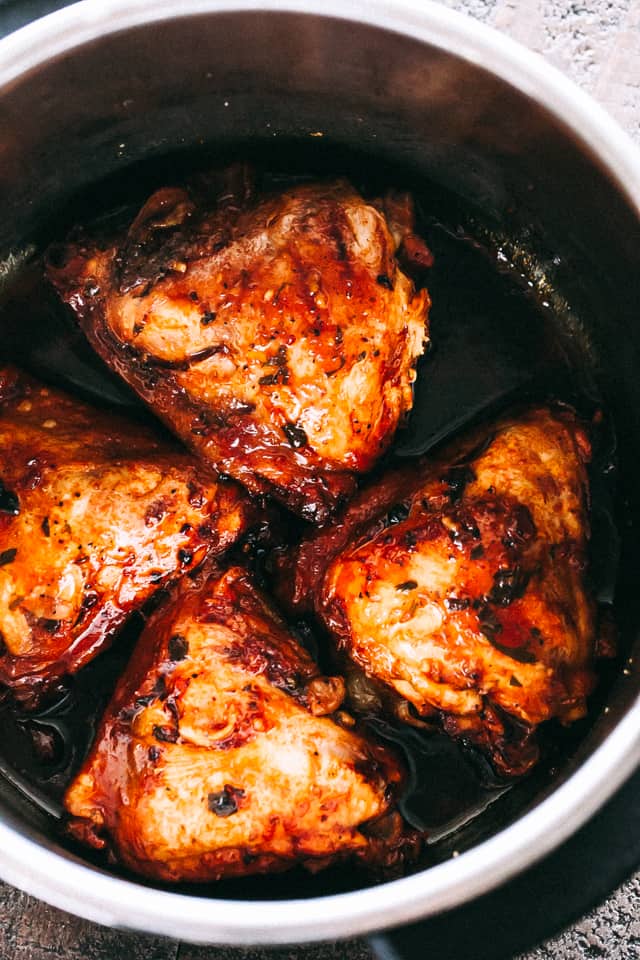
- Brown the chicken: Season the chicken thighs with salt and pepper. Arrange the seasoned chicken thighs in the Instant Pot and cook for about 2 to 3 minutes per side. Browning the chicken adds depth of flavor and helps to lock in juices.
- Add the sauce: Pour the prepared honey garlic sauce over the chicken thighs.
- Cook in poultry mode: Cover and lock the lid of the Instant Pot, then cook in poultry mode for 20 minutes.
- Release the pressure: Turn off the Instant Pot and allow it to release the pressure naturally for about 5 minutes. This step is important for safely opening the pot and ensuring the chicken remains tender.
- Serve and garnish: Transfer the cooked chicken to a serving plate and spoon the sauce over the top. Garnish with toasted sesame seeds and sliced green onions and enjoy.
Recipe Tips
- Chicken options. If you only have chicken breasts, don’t worry! Just use the same method, but cook on the poultry setting for 10 minutes.
- Soy sauce substitute. If you are allergic to soy sauce or can’t have soy for other reasons, feel free to use coconut aminos which is soy-free, gluten-free, and vegan.
- Thicken it. Want a thicker sauce? After cooking, remove the chicken and set the Instant Pot to sauté mode. Simmer the sauce until it reduces to your desired consistency.
- Make it spicy. For an extra kick, add a pinch of red pepper flakes to the sauce.
- Make it with fish. I also have a seafood option with the same wonderful flavors Grab this recipe for honey garlic sauce salmon.
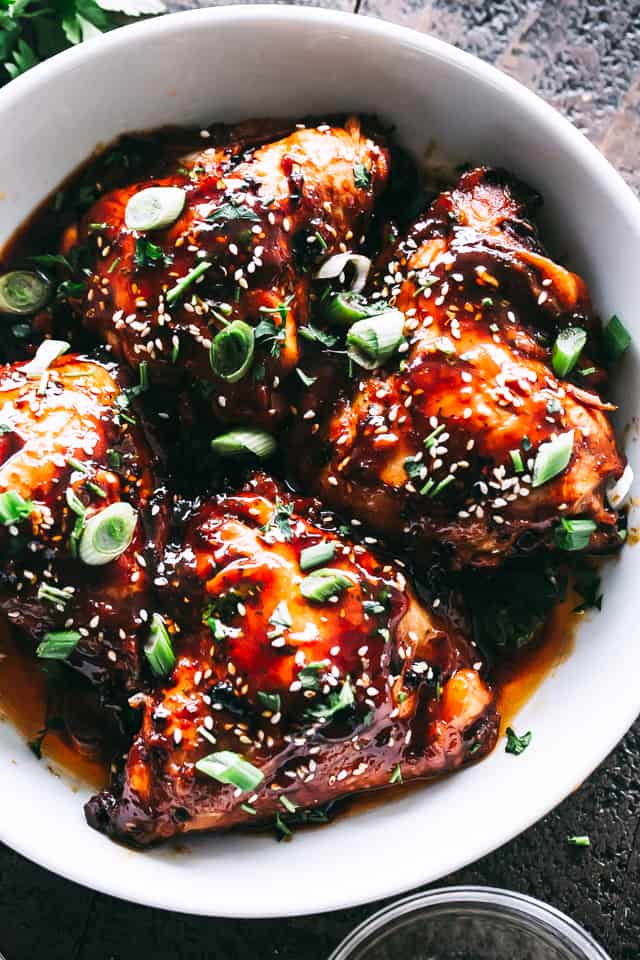
Serving Suggestions
To soak up all the delicious honey garlic sauce, I often serve honey garlic chicken over rice or with beef ramen (minus the beef). I like to add a side of my air fryer roasted broccoli and mashed potato pancakes for a complete meal. For dessert, a slice of German marble cake is the perfect finish!
Storing and Reheating
To store leftover chicken, let it cool completely before placing it in an airtight container. Keep it in the refrigerator for 3-4 days. For longer storage, you can freeze the chicken for up to 3 months. Thaw in the refrigerator overnight before reheating.
More Delicious Chicken Recipes
- Spicy Sweet Sticky Chicken Thighs
- Crock Pot Chicken Drumsticks
- Instant Pot Chicken Tinga
- Black Pepper Chicken
- Crock Pot Honey Lemon Chicken
Pin this now to find it later
Pin It
Instant Pot Honey Garlic Chicken
Ingredients
- ⅓ cup honey
- 4 cloves garlic, minced
- ½ cup low sodium soy sauce
- ½ cup ketchup, I use no-salt ketchup
- ½ teaspoon dried oregano, or any other dried herbs that you prefer
- 2 tablespoons chopped fresh parsley
- 1 tablespoon sesame seed oil, vegetable oil or olive oil can be used
- 4 to 6 bone-in skinless chicken thighs
- salt and freshly ground black pepper, to taste
- ½ tablespoon toasted sesame seeds, for garnish
- sliced green onions, for garnish
Instructions
- Make the sauce. In a small mixing bowl combine honey, minced garlic, soy sauce, ketchup, oregano and parsley; mix until well combined and set aside.
- Prep and cook the chicken. Heat the Instant Pot in sauté mode. Add sesame oil to the pot to heat up. Season the chicken thighs with salt and pepper and cook them for about 2 to 3 minutes per side or until browned.
- Add the sauce. Add the prepared honey garlic sauce to the pot; cover and lock the lid.
- Cook. Set the IP on poultry mode (or pressure cook mode) and cook the chicken for 20 minutes. Turn off the pot and allow it to release the pressure, about 5 minutes.
- Serve. Transfer the chicken to a serving plate and spoon the remaining sauce from the pot over the top. Garnish with toasted sesame seeds and sliced green onions, then serve.
Video
Notes
- Soy sauce alternatives. If you are allergic to soy sauce or can’t have soy for other reasons, feel free to use coconut aminos, which is soy-free, gluten-free, and vegan.
- Chicken. You can make this with boneless chicken thighs or chicken breasts, but you will have to adjust the cooking time because boneless meat cooks faster than bone-in.
- Burn notice. If you get a “burn notice” on your Instant Pot, it usually means there’s not enough liquid in the pot or that something is stuck to the bottom. To avoid this, you can deglaze the pot after browning the chicken by adding a bit of broth or water and scraping up any browned bits before adding the honey garlic sauce.
Nutrition
Nutritional info is an estimate and provided as courtesy. Values may vary according to the ingredients and tools used. Please use your preferred nutritional calculator for more detailed info.


This really is delicious , I have made a few revisions that work better for me. I brown my chicken in a skillet on stove, it’s much easier than the deep instapot, I use canola oil not the sesame. For the sauce I add around 1/4 cup real maple syrup it sweetens it up a bit and is a natural sugar. Cook chicken in instapot 20 min, release the steam, remove chicken to plate , while pot is still hot I add the sesame oil and cornstarch slurry to thicken . Chicken is fall off the bone and that sauce is so good. I serve with jasmine rice and steamed broccoli or fresh steamed green beans.
I do not salt the chicken as the soy sauce provides more than enough saltiness.
Do I have to thaw the chicken first or can I put it directly in the instapot from frozen? Thanks in advance!
I would thaw it first. You need to cook/sauté it for a few minutes on each side. If it is frozen there will be little to no cooking happening and the chicken might be undercooked when the IP is done.
This is not true. Cooking chicken in the pot from frozen adds no more time onto cooking and just might take longer to come to pressure. Sill cooks the same, comes out delicious every time. Only step you’re missing is sautéing the chicken to add a bit of a crust, but I don’t it will matter much.
I have the PPXL and have only used it once. hoping I can figure this out. I hear the instapot is more user-friendly. :/
If your chicken is frozen I hope you cleaned it first the chicken shouldn’t be frozen because you have to brown it ,make sure you pat it dry before browning after you clean it all chicken should be cleaned before cooking !!!!!!!
Washing raw chicken before cooking it can increase your risk of food poisoning from campylobacter bacteria. Splashing water from washing chicken under a tap can spread the bacteria onto hands, work surfaces, clothing, and cooking equipment. … Campylobacter is the most common cause of food poisoning in the UK.
This was my first IP attempt. It was ok, but I don’t think I’d make it again. I did use boneless skinless chicken breasts, which I realize are boring. It definitely wasn’t a 30 minute meal. 10 prep, 6-7 saute, 20 cooking, another 10 at least to let the pressure lower (based on the comment to do it that way to avoid toughness). All in all, it was an hour. The sauce didn’t reduce, and I wasn’t that crazy about it. So, meh, but obviously I’m not the popular opinion. I appreciate the clear instructions and maybe I’d try something similar with a different sauce / less ketchup next time.
This is my first run with an Instant Pot. I used 2 boneless breasts cut in half (3 qt pot) and did 8 minutes on steam. It was decent, but I’d call the chicken a little bit chewy. Almost like it would be if it were dry, but it’s not dry . Hope that makes sense. What should I adjust?
For chicken you want to use the poultry setting not steam. It will automatically set to 15 minutes and I always up it to 20 because it’s fall apart tender. Also you DONT want to quick release the pressure. That will make it chewy and/or dry. After it beeps let it be until the silver pressure indicator goes down. Usually between 12 and 15 minutes. The longer you leave it in the warming mode to depressurize the more juicy and tender meat will be. All of this is for meat in general. The instructions and tips that come with the IP should definitely be better.
I do not have a poultry setting on my Instant Pot Ultra…what setting
do you suggest I use?
The newer pots do not have the poultry setting. Had to use the Pressure setting. After about 8 min of steam venting the “burn” message comes on. Hit cancel and checked the chicken – it didn’t appear to be burning – guess it was the skin that was stuck on after sauteing. So won’t use the pot to saute anymore. I added 1/3 cup of water and turned it on again. Same thing but chicken appeared to be “boiled” anyways so we ate.
Meat setting in Ultra might be the trick… less heat on bottom?
Need to deglaze pot after browning thighs. Just add some of the liquid while it is still on saute and use spatula to scrape all chicken bits off the bottom of the pot. the bits of meat after sauteing will cause the burn message to come on.
I have been using the IP for some time now and I have a different experience. When I cook bone-in chicken thighs in the IP for 6 minutes on high pressure with natural release (which takes a little more than 20 minutes) the chicken comes out too dry. I do believe that quick releasing right away is probably not the best thing to do, but letting meat natural release for the entire duration often makes the meat too dry. I would do quick release after 5-10 minutes for best results.
I am surprised that 20 minutes on high pressure can produce tender chicken. I don’t know if it’s possible that some instant pots run hotter than others?
We loved this recipe. In fact my husband said we need to have this alt.
I am very happy you enjoyed it!! Thank YOU!! 🙂
I just got an instant pot for my birthday. I wanted a chicken recipe that used normal ingredients I had on hand. I googled “Instant Pot Chicken Recipe” and yours was at the top of the list. (I had everything but sesame seeds and green onions, so I omitted those.) This was fabulous; my picky eater wanted seconds AND thirds! Definitely a winner. I’ll definitely be making this again. Thank you for giving me a successful introduction to the Instant Pot.
I love the sweet/salty combination and depth of flavor here! This would be a fan favorite at my house!
Not clear on something…How is this recipe tagged as “Keto” with 17g of sugar per serving?
Hello, I tried this recipe for the first time tonight with 2 chicken breasts cut in half and cooked for 9 minutes. They were done as close to perfect. 8-9 minutes will be all the time 2 chicken breast need.
I would definitely thicken the sauce(juice) with corn starch at the end of cooking time, like recommended by others next time. Pretty good recipe over-all.
My IP doesnt have poultry mode, what should i cook it in? For how long?
Mine doesn’t either so i used “manual high” for 12 minutes and it was amazing! I used boneless thighs and it was so moist and tender. I also thickened up the sauce with 2 tbsp of cornstarch, A keeper for sure!
Ahh hoping this works!! I’ve gotten the burn warning twice now and I’ve followed the recipe exactly – only difference is chicken breasts instead of thighs
Hello
I only have chicken tenderloins. 10 minutes still ok? Or should I do it for less? I’m still very new at this IP thing.
Thank you
Hi! According to my experience, I would do about 8 minutes for tenderloins. 🙂
I appreciate your response, thank you so much. I’ll be trying these tonight. Can’t wait !!!!!!
I only had 3 big thighs for the four of us so when the chicken was done, I shredded it and tossed it back in to cook the sauce down. Used a little cornstarch to help thicken.
I also added fresh ginger, Sriracha black pepper blend, and lime juice. I think next time I will add some actual Sriracha sauce. It needs some heat to offset the sweetness. But I will definitely make it again.
I did breasts, cut in half to make short, fat pieces, with the saute and 10 minutes on Poultry as suggested. They were perfect (if anything I might cut the time down a minute or two). I think this would be quite nice if the chicken were shredded or diced before adding back to the thickened sauce as well. Served over jasmine rice, this was great and my five and seven year olds agreed!