This post may contain affiliate links. Please read our disclosure policy.
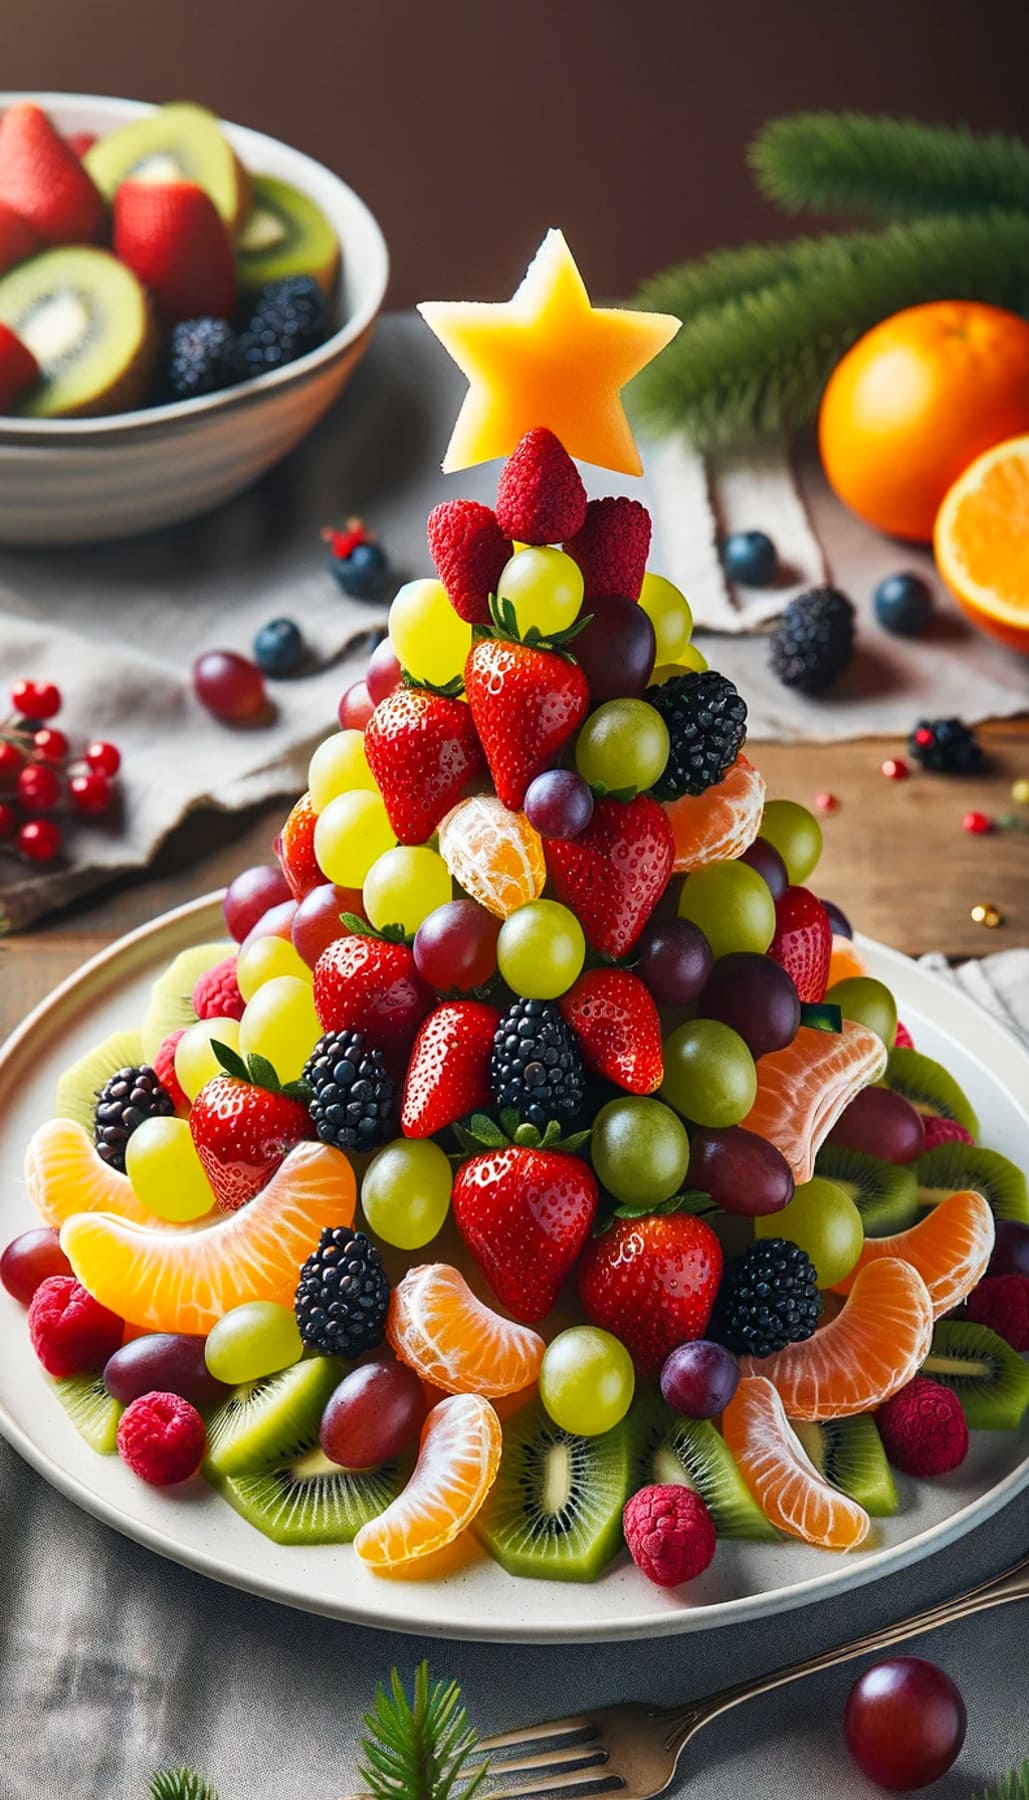
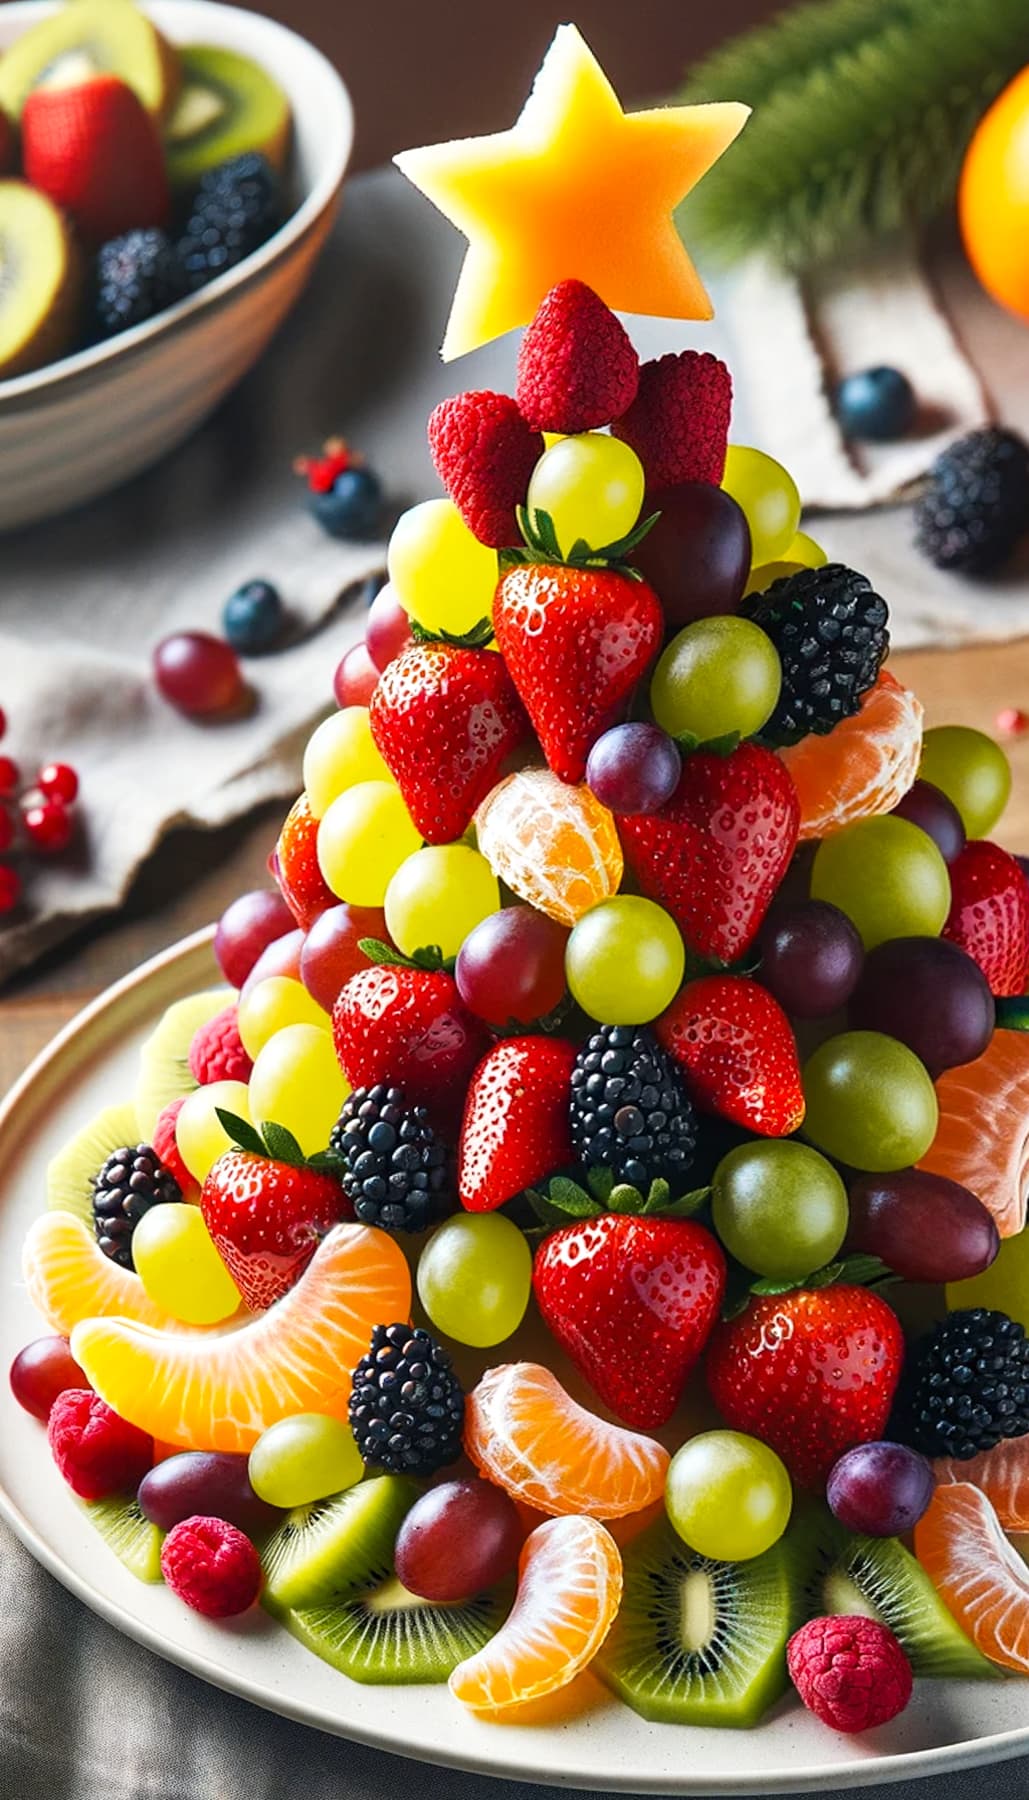
Discover the joy of a fruit Christmas tree! This is a festive, edible centerpiece perfect for the holiday season. Follow the step-by-step instructions to see how easy it is to DIY a Christmas tree from fresh fruits like strawberries, kiwis, grapes, and more!

Do you have a centerpiece for your holiday table yet? Drawing inspiration from my days at a flower shop, I make this edible fruit Christmas tree stacked with kiwis, strawberries, oranges, grapes, apples, and melons. The fruit you use is totally customizable! I even get the kids involved. Even if their approach is slightly more… chaotic… than mine. 😆 I think we’ve crafted something truly special, and I’ll show you how easy it is to create your own, step-by-step!
Why This Christmas Fruit Tree Rocks
- It’s easier than it looks. All you need are toothpicks, a sturdy base, and a carrot to make your frame. After that, it’s as easy as decking the tree with your favorite variety of fruit. It takes under an hour!
- Party-ready. Get ready for oohs and ahhs as guests take in your handiwork. A Christmas tree made from fruit is the perfect add-on to a holiday table or appetizer spread with a bowl of fruit dip on the side.
- A fun holiday activity. Just like we look forward to decorating our real Christmas tree, I find myself looking forward to decorating this edible one. It’s so much fun, and a great holiday activity for kids. You could even make smaller versions so everyone can create their own!

What Fruit Should I Use?
Just about any fresh fruit you’d like! The goal is to have a variety of shapes and colors, for visual appeal. This is the ultimate “eat with your eyes” dish. Here are the fruits I use, and that I’d recommend for a fruit Christmas tree:
- Kiwis
- Berries (strawberries, blackberries, raspberries, blueberries)
- Melon (honeydew or cantaloup, or both!)
- Grapes
- Apples
- Mandarin oranges
- Starfruit
Tips for Garnishing a Fruit Christmas Tree
- Choose a sturdy fruit for the base. Use a firm, large fruit like an orange, a pineapple, or a melon as the base of your tree. This will provide stability.
- Get creative with fruit shapes. Cut fruits into shapes that are easy to skewer and attach to the tree. You can use cookie cutters for fun shapes like stars or hearts.
- Add greenery. Use fresh herbs like parsley or mint to add greenery and fill any empty spaces in the tree. This will give your tree a more authentic and lush look.
- Tree topper ideas: Star-shaped fruit, like a slice of starfruit or cut-out melon, makes a great tree topper.
- Stabilize as you go. Make sure your tree is balanced as you go along. Too much weight on one side can cause it to topple, so do your best to evenly distribute the weight.
- Serving suggestion. Sprinkle the tree lightly with powdered sugar for a ‘snowy’ effect when serving. Serve alongside vanilla yogurt, fruit dip (like this churro-inspired cream cheese fruit dip) or chocolate sauce.

Frequently Asked Questions
This fruit Christmas tree lasts 2-3 days in the fridge, depending on the types of fruit you use. Brushing the tree with lemon juice helps extend the shelf life. See my detailed storage tips below.
Yes! I’d recommend preparing your fruit tree up to 1 day before for the best freshness.
Pin this now to find it later
Pin It
Fruit Christmas Tree
Ingredients
- 1 large orange, trimmed at the top and the base; do not peel
- 1 large carrot
- Grapes, red and green
- Strawberries
- Orange or mandarin segments, peeled
- Kiwi, peeled and sliced
- Fresh blackberries
- Apples, sliced
- Melon, cut into star shapes
- Fresh parsley stems or other herbs, optional
- Powdered sugar, for dusting, optional
Instructions
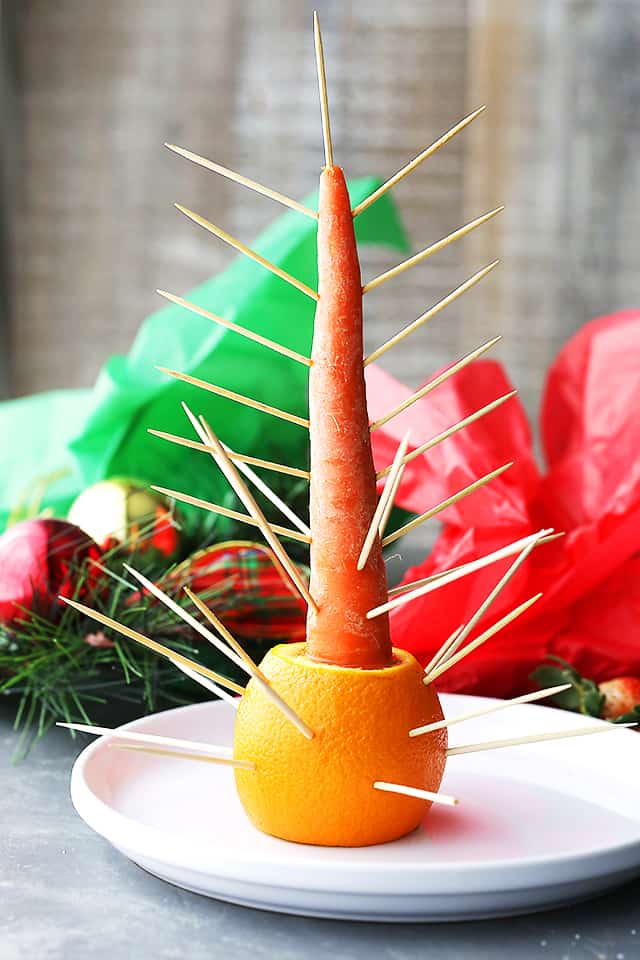
- Make the frame. Slice the orange at the top and at the base and place it on a sturdy plate. Position the carrot in the middle of the orange and press it down into the orange. Start placing toothpicks or skewers into the orange and the carrot at an upward angle.
- Assemble. Add the fruit onto the toothpicks and keep going until the tree is completely filled up. Fill any gaps with smaller fruits.
- Garnish. Arrange the fresh parsley stems or herbs around the tree if using. You can also stick fresh rosemary leaves in between the fruits.
- Add a tree topper. Top the tree with one whole strawberry and a few raspberries, and place a melon "star" right above the strawberry.
- Serve! Optionally, sprinkle with powdered sugar and serve.
Equipment
Notes
- The Base: Choose a sturdy and large fruit, such as an orange, for a stable base. Slice off the fruit’s top and bottom to create flat surfaces, ensuring it sits securely on the platter.
- Fruit Selection: Choose a variety of colorful fruits and pat them dry with paper towels.
- Cutting and Attaching Fruit: Cut fruits into shapes that are easy to skewer and attach to the tree. Attach the larger pieces first and then fill in gaps with smaller pieces of fruit.
- Adding Greens: Use fresh parsley, rosemary, or mint to add greenery and fill any empty spaces.
- Topper: A star-shaped melon piece makes a great choice for the tree topper.
- Stability: Make sure your tree is balanced as you go along. Too much weight on one side can cause it to topple.
- Storage: If you’re not serving the tree immediately, brush the cut fruit with lemon juice, cover the tree with plastic wrap, and refrigerate to keep it fresh.
- Decoration: You can sprinkle the tree lightly with powdered sugar for a ‘snowy’ effect.
- Serving: Serve alongside fruit dips, flavored yogurt, or a chocolate dip for extra deliciousness.
Nutrition
Nutritional info is an estimate and provided as courtesy. Values may vary according to the ingredients and tools used. Please use your preferred nutritional calculator for more detailed info.
How To Make a Fruit Christmas Tree
You’ll find a lot of fruit Christmas trees with foam bases or plastic frames. But I like to keep mine 100% edible! Apart from the fruit you’ll use to garnish your tree, you’ll need an unpeeled orange, a carrot, and toothpicks.


- Make the frame. Start with an unpeeled orange. Slice off the top and bottom of the orange, then stick a long carrot in the center of the orange for extra stability. Set it on a sturdy plate.
- Add toothpicks. Insert toothpicks or skewers into the carrot and orange at an upward and outward angle to create the tree’s shape (see photo).
- Decorate! One at a time, thread the fruits onto the toothpicks. Heavier fruits should be placed at the bottom, while lighter, smaller pieces can go towards the top. I like to attach larger fruit pieces first and then fill in gaps with smaller pieces afterward. Remember, the beauty of this tree is in its homemade charm!
- Add the finishing touches. Tuck fresh parsley, rosemary sprigs, or thyme sprigs in between the fruits for a garnish. I use a star cookie cutter to cut out a melon for my tree topper! See the Tips section for extra guidance.
How to Store a Christmas Fruit Tree
To keep the fruit tree fresh until it’s time to serve, brush the cut fruit with lemon juice or cover it with plastic wrap, and store it in the fridge. If you’re making this ahead, you can also toss the fruit with lemon juice before you build your tree. It’ll keep the fruit from browning.


Nice IA photo!
Very pretty and creative for Christmas!
Such a cute idea! I love the snow effect! xo Loren // http://www.thinkelysian.com
That is so cool, my kids would have a blast helping me make this!
Such a great idea. Healthy and easy. This would be totally fun to do with the kids!
This looks amazing! I love how you showed up step by step pictures!
Too cute and such a perfect idea for Christmas!
This is awesome! So creative, and yes, spend that hard-earned cash elsewhere! Merry Christmas to you and yours!